Connecting to a Game Boy Link Cable From a PC
Trading Pokemon to a Game Boy from a PC via an Arduino
Putting theory into practice #
Previous posts have described our process of learning about the Game Boy hardware and how it’s used. At this point, we have a good level of familiarity with how the link cable works, some useful tools for experimenting with the connection, and some known good data to send. There’s been a lot of research, and until now we’ve only talked about how we can use our software tools with an emulator. It’s time to dive into the meat of this project: interfacing with original Game Boy hardware!
This involves building an adapter to send data between a PC and Game Boy via the link cable. Once constructed, the mock Pokemon trade data from last time can be sent to verify the connection. From there, we can take it a step further and try connecting a real Game Boy to an emulated one. Let’s get started!
Building a Game Boy link cable adapter #
The eventual goal of this project is a plug and play solution in the form of a nondescript dongle that connects to a Game Boy via the link cable and to a TCP server over Wi-Fi. However, testing is much easier with a direct connection to the console. So with this in mind, a good first step is a barebones USB to link cable adapter. An Arduino Uno clone (i.e., ATmega328P-based development board) was used, although any decent microcontroller would do the job just fine and the final hardware will almost certainly use a different MCU. The Arduino is easy to use to make a prototype quickly and has plenty of GPIO pins available.
To access the individual wires inside of the link cable without having to cut into it, a small breakout board was used. Helpfully, one already existed with open-source CAD files available, meaning it was very cost-effective to have a good number of them fabricated for this project (100 boards for ~$10 – more than enough for two people).
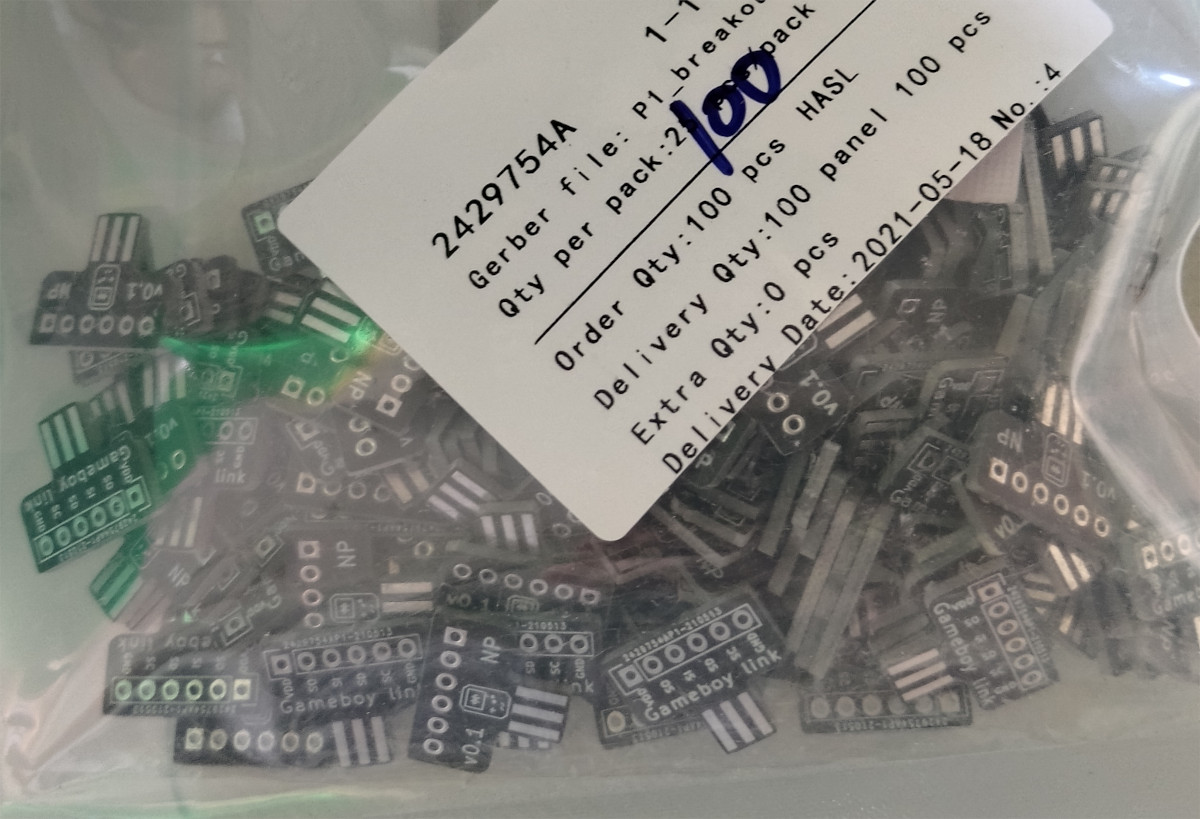
Game Boy link cable breakout boards. We have a few extra.
With a way to access the individual wires, it’s straightforward to connect them to the Arduino’s GPIO pins and manipulate the GB SPI signals programmatically. Bits must be sent one at a time. Per the protocol’s specification, the microcontroller sets the output line high or low, according to the value of the bit to send, and then pulses the clock line to indicate to the Game Boy that a transfer is occurring. At the same time, it reads the input line to retrieve the bit being sent by the Game Boy. After 8 bits have been shifted in and out in this way, an entire byte will have been sent and received.

Connecting a Game Boy’s link cable to an Arduino via a breakout board
Since the Game Boy’s link cable protocol is effectively SPI mode 3, existing SPI libraries actually work fine for interfacing with it. But the protocol really isn’t that complex to implement, and part of the goal of this project is to learn, so no libraries were used here. This way, we also have more control over the precise timing if we need to tweak it later for compatibility. Below is our code for exchanging a byte.
byte transfer_byte(byte tx)
{
byte rx = 0;
for (int i = 0; i < 8; ++i)
{
digitalWrite(PIN_SO, (tx & 0x80) ? HIGH : LOW);
tx <<= 1;
// http://www.devrs.com/gb/files/gblpof.gif
// 120 us/bit
digitalWrite(PIN_CLK, LOW);
delayMicroseconds(60);
byte rx_bit = (digitalRead(PIN_SI) == HIGH) ? 1 : 0;
rx = (rx << 1) | rx_bit;
digitalWrite(PIN_CLK, HIGH);
delayMicroseconds(60);
}
return rx;
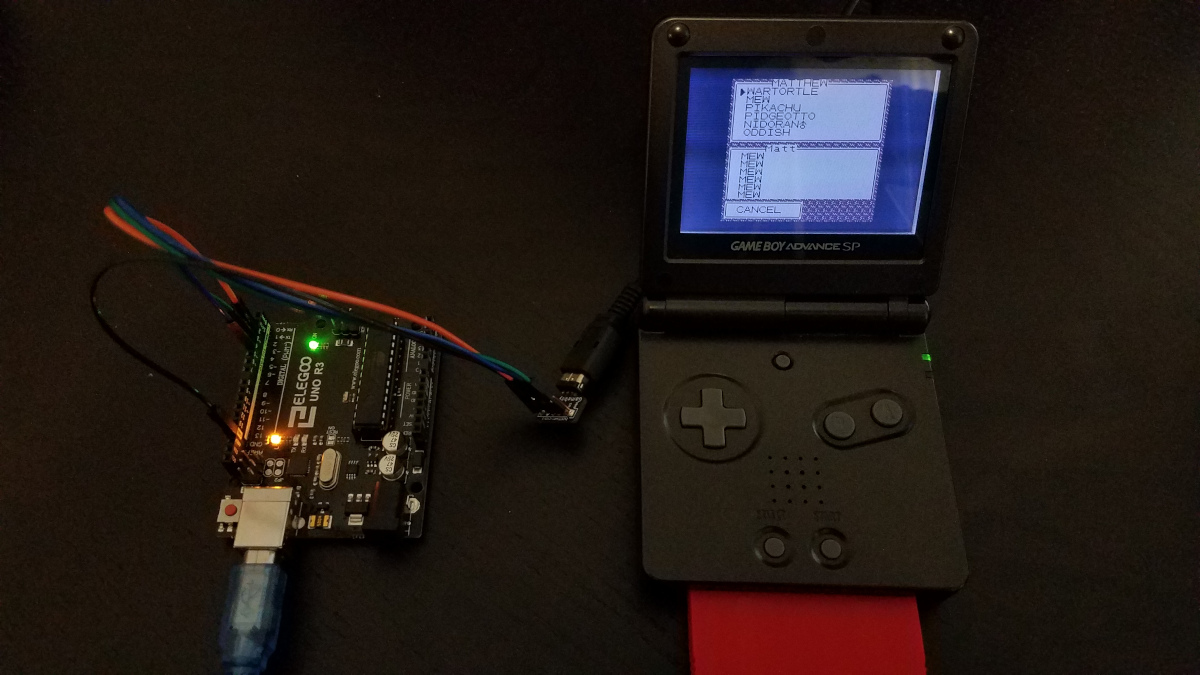
}As a sanity check, if we hard-code the Arduino to constantly send the value 1
and then visit the Cable Club in Pokemon Red, the game displays the same message
as when it’s connected to another copy! This confirms that the adapter is able
to successfully send bytes to the Game Boy. To validate the other direction of
data flow, we can send the received bytes to a PC over the Arduino’s USB serial
interface. Doing so shows that the Arduino is reading the value 2 from the
Game Boy, which is correct! For details on the game’s link cable protocol, see
the previous post.
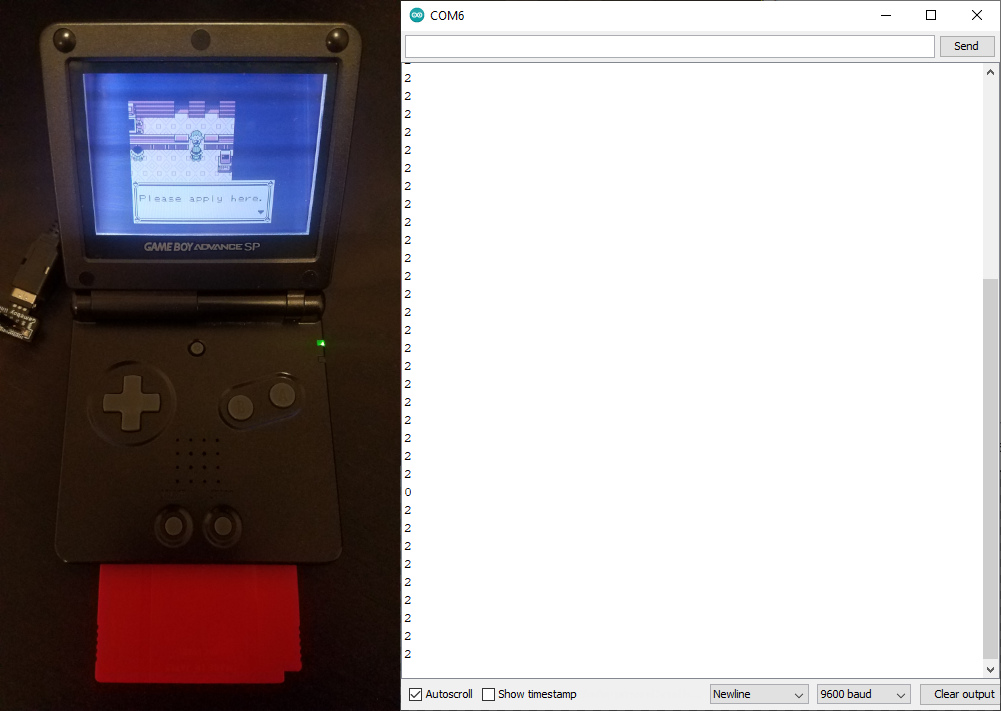
Tricking Pokemon Red into behaving as if another game is connected by sending the first byte of its link cable protocol. Received bytes are shown in the serial monitor window.
For flexibility, it’s preferable to read and write link cable bytes entirely from a PC rather than reprogramming the Arduino every time. This is simple enough: we can continue to send the received bytes over USB serial to the PC as we are now and read the next byte to send from USB serial as well. The code running on the Arduino will block until it receives a byte from the PC, send that byte to the connected Game Boy, read the byte sent by the Game Boy and forward it to the PC, then repeat the process indefinitely. Although the final dongle will use Wi-Fi, it will likely retain this USB serial capability as well for debugging and troubleshooting purposes.
The adapter is purposefully as low-level as possible, only providing a way to send and receive single bytes at a time and nothing more. Keeping it close to the hardware like this with no additional logic allows higher-level abstractions to be built entirely in software on the PC side, which will be much easier than doing it on the Arduino. Rapid iteration of tools which use the adapter is important since this project is not very well-defined yet. As we go, if assumptions are wrong, we don’t want to have to throw away a ton of work. The full source code for the adapter is available here.
Sending data to a Game Boy #
With the hardware connection set up, it’s time to send real data! We can make use of the mock Pokemon trader script from last time, which is confirmed to work with an emulated Game Boy. First, a helper class was created for interfacing with the USB link cable adapter. In a loop, it calls a configurable callback function with the previously-received byte from the Game Boy as input (or a null value, for the first call). It then takes the byte returned by the function, sends it to the specified serial device (in this case, our adapter), and saves the response for the next iteration of the loop. The code for this serial link cable server is available here. It’s modeled after the BGB link cable server described in the previous post, and in fact the callback function doesn’t need to know which server it’s running within. This allows the same function to work with both an emulator and real hardware.
We do, however, need to make two small modifications to the mock trader code
itself. Firstly, it must be able to handle null data as input (for the initial
call). Second, the script was originally written to mimic a copy of Pokemon
operating in slave mode (since our BGB link cable server only allows the
connected emulator to operate in master mode). However, for our use case a real
Game Boy can only operate in slave mode due to latency, and so the script needs
the ability to behave like a copy of Pokemon running in master mode. This isn’t
too big of a change. In the
role negotiation step, the script
needs to send a 1 instead of a 2.
Putting all of the pieces together, a new argument was added to the mock trader script: the type of connection – BGB or serial. If serial is chosen, the state machine management class is instantiated in master mode and the serial link cable server is used instead of the BGB link cable server. The updated code is here. Running the script with a Game Boy-connected Arduino plugged into the PC works as expected and a fake trade can be executed! Check out the video below for an example.
Conducting a Pokemon trade by sending data to a Game Boy from a PC
At first, this was quite slow but it turned out that was because the adapter code was waiting for more time than was necessary between each transferred byte. It’s not possible to know when the slave mode Game Boy is ready to send data. Since everything is running on the bare CPU, games typically just count cycles until “enough” time has passed to be sure that the other game is ready. If the next byte is sent too early, the slave device could send bad or incomplete data in response or get caught in a loop (preparing response, received a byte, preparing response, etc.). If our adapter was operating in slave mode this wouldn’t be a problem since the second Game Boy would tell it when to send the next byte via the clock signal. The delay between bytes was initially set at a very conservative 100 ms. On its own, that’s not much time at all. But multiply it by the hundreds of bytes that Pokemon sends and it really adds up. It turns out that the game will work with a delay as low as 5 ms, lowering the time it takes to send trainer data from a little over a minute to around 5 seconds – similar to how long it normally takes with two Game Boys!
Different games will certainly have different delay requirements. We don’t want to choose an overly-large delay value that’s safe in general, since it will slow down games which don’t need it. The server side will have to know how long to wait at a minimum on a game-by-game basis. Although, it’s likely that many games will have similar timing needs. Further, the latency of the internet will presumably be more than enough. More testing is required in this area with different games.
Connecting an emulator to a Game Boy #
We’ve now verified that our adapter works and that real data can be sent and received from a PC! There’s one last tool at our disposal which still needs to be tested with real hardware: an emulator connection. Connecting BGB to a real Game Boy will be useful for testing how different games deal with latency and unstable connections since the emulator has numerous debugging features that allow changing and inspecting the game in real-time as it’s running.
Using the server + callback function approach doesn’t lend itself well to connecting BGB to our adapter since the helper classes we’ve written so far for each both act as servers. So, another one was written – a serial link cable client, rather than a server. This class has one responsibility: to enable sending a byte to the Game Boy and receiving its response. There’s no loop or server functionality, and in fact most of its code is related to connection management since the pyserial library takes care of the actual USB serial communication. It’s simply a light abstraction on top of our serial adapter protocol. Its code is available here.
Putting it all together, a script was written which starts the BGB link cable server with the callback set to a function that uses the serial link cable client class to send the BGB byte to the Game Boy and the Game Boy byte back to BGB. Its code is here. Connecting to Pokemon works flawlessly. I can even battle! Below is a video of two very mismatched teams facing off in this way.
A Pokemon battle between real hardware and an emulator
Beyond Pokemon, in theory it should “just work” for any two games, allowing us to connect them without having to write any additional code. This is because the emulator is operating in master mode and the Game Boy is operating in slave mode – just like two real Game Boys. There’s no need for double-slave latency workarounds here since the emulator/master can slow down or pause as necessary, and therefore simply forwarding bytes back and forth is sufficient. The two games are operating as they were designed to.
After Pokemon, I tried Tetris – a game I’ve written no specific code to support – and it works too. See the video below.
Multiplayer Tetris between BGB and a Game Boy “just works” out of the box
Future work #
This was some great progress! We’re able to send arbitrary data between a PC and Game Boy – both programmatically and from an emulator. We can use these new tools to pry deeper into how the link cable protocols of specific games work and to test assumptions and theories about the connection using real hardware.
With a hardware connection like this, it’s also possible to start building a backend multiplayer server, although until we have a better understanding of what different games will require (e.g., timing, game-specific protocols, etc.) it’s best to stick with a lightweight prototype for now. A good next step will be to use the USB link cable adapter to connect two Game Boys together through a PC. From there we can try a LAN connection using two different PCs, and then a link over the internet!
A whole bunch of doors have just opened up!